Archiving: Difference between revisions
| Line 19: | Line 19: | ||
<small>Create XML Archive</small> allows you to create a new XML archive for each schema mapped. Simply select the schema and press <small>Create Archive</small> (leave the defaults unless you have a good reason to change them). During the archiving process, the <small>Log</small> will display messages indicating the progress: | <small>Create XML Archive</small> allows you to create a new XML archive for each schema mapped. Simply select the schema and press <small>Create Archive</small> (leave the defaults unless you have a good reason to change them). During the archiving process, the <small>Log</small> will display messages indicating the progress: | ||
[[File:xmlArchivesProgress.png|border]] | [[File:xmlArchivesProgress.png|border|775px]] | ||
You can always cancel the archiving process by pressing <small>Cancel</small> next to the respective entry listed under <small>in progress</small>. However, it will take some time for the cancelling to show effect, namely until the current paging step has been completed. Depending upon the paging size set and the speed of your server, this can be up to one minute. Always wait until the process has stopped before starting a new dump! | You can always cancel the archiving process by pressing <small>Cancel</small> next to the respective entry listed under <small>in progress</small>. However, it will take some time for the cancelling to show effect, namely until the current paging step has been completed. Depending upon the paging size set and the speed of your server, this can be up to one minute. Always wait until the process has stopped before starting a new dump! | ||
Revision as of 12:07, 5 July 2012
This page describes the archiving features in version 3.2 or later. If you're using version 3.0 or 3.1, please read the version 3.0/3.1 page.
With the archiving feature, you can create archive files that store all data published by your BioCASe web service. That might be handy if your database stores a huge number of records (several hundred thousands or even millions) and the traditional harvesting approach of paging through the records published by the web service takes unacceptably long. Once stored in an archive, this file can be downloaded from your web server or sent to the harvester via email and ingested much faster.
There are two types of archives: XML Archives simply store the records as compressed XML documents, each holding a customizable number of records. If your web service publishes 500,000 records by using the ABCD data schema, for example, an ABCD Archive created for that service could hold 500 ABCD documents, each storing 1,000 records. For each schema supported by a BioCASe web service, a separate XML Archive can be created. You can download a sample ABCD Archive here: File:AlgenEngelsSmall ABCD 2.06.zip.
DarwinCore Archives (DwCAs), in contrast, consist of one or several text files storing the core records and related information, zipped up together with a descriptor file and a metadata document. Similar to a BioCASe web service, DwCAs can be used to publish data to the Global Biodiversity Information Facility (GBIF). A detailed specification can be found on the TDWG site, a sample archive here: File:Desmidiaceae Engels.zip.
The BioCASe Provider Software can create XML archives for each schema supported by a web service. Information published by web services using the the ABCD 2.06 or HISPID 5 schema (dubbed as “ABCD/HISPID dumps”) can also be stored in one or several DarwinCore Archives. This is due to the fact that one BioCASe web service can publish several datasets, and a DarwinCore Archive can only store a single dataset. Unsurprisingly, DwCAs make use of the DarwinCore data standard, which is flat and less complex than ABCD. Consequently, a DarwinCore Archive will store less information than an ABCD dump for a given web service.
XML Archives
Once you’ve finished mapping a schema (see ABCD2Mapping to learn how to map ABCD, for example) and tested the resulting web service, you can create an XML Archive for that web service. To go to the archiving page, simply use the Archive link on the overview page of the datasource setup. If you haven’t mapped a schema, you won’t be able to create any archives.
Usage
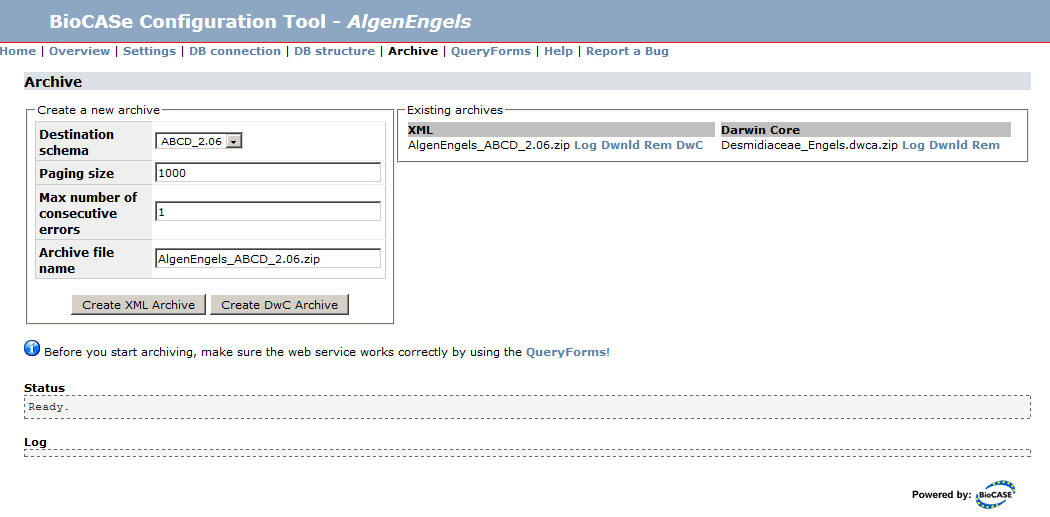
In the box “Existing Archives” you will see a list of already existing XML and DwC archives. If you go to the archiving page for the first time, it will be empty. Once you’ve created archives, they will show up here and can be downloaded and removed by using the links next to the entries.
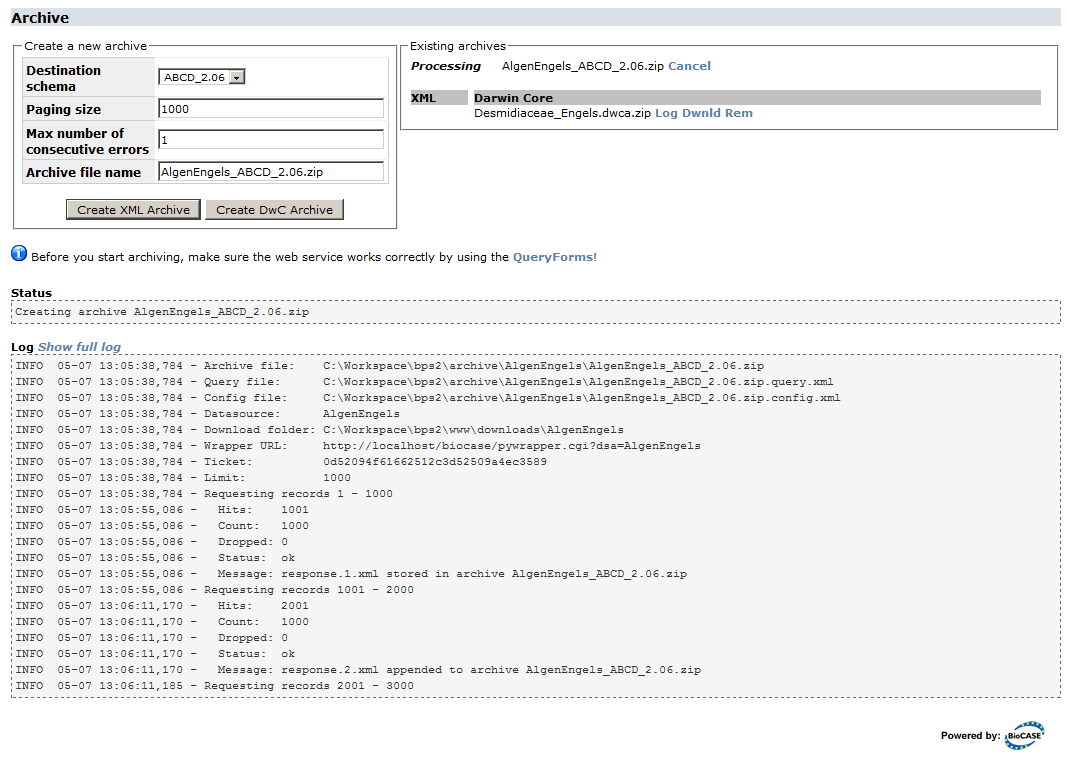
Create XML Archive allows you to create a new XML archive for each schema mapped. Simply select the schema and press Create Archive (leave the defaults unless you have a good reason to change them). During the archiving process, the Log will display messages indicating the progress:
You can always cancel the archiving process by pressing Cancel next to the respective entry listed under in progress. However, it will take some time for the cancelling to show effect, namely until the current paging step has been completed. Depending upon the paging size set and the speed of your server, this can be up to one minute. Always wait until the process has stopped before starting a new dump!
As the archiving progresses, the first lines of the log will drop out of view. Pressing Show full log will open the full log in a separate browser tab. You can navigate away from the archiving page during the process (or simply close it) and return later. Once finished, the dump will show up in the Finished list, if it’s still being processed, under In progress. Pressing the Info link next to an entry will display the log again. Download and Remove will do exactly what the links suggest.
Even though you can create several archives in parallel, it is not a good idea. The archiving process will put heavy load on your servers – both the database server for data retrieval and the BioCASe server for creating the XML documents. So it is advisable to create just one archive at a time in order to allow both servers to respond to other requests.
Customizing the Archive
There are four parameters for customizing the archiving process:
Destination schema: Data schema that will be used for storing the published records in the archive.
Paging size: Number of records stored in each document. The default 1,000 should be suitable for most cases. Important note: Be aware that a BioCASe web service can restrict the number of records per request! If that limit is below the paging size set for archiving, the paging size will be adjusted to the limit of the web service.
Max number of consecutive errors: The default for this is “1”. That means that if an error occurs during data retrieval or XML/archive creation, the archiving process will be aborted. If you set this to a value larger than 1, the process will be cancelled after this number of errors. This allows you to complete the archiving in spite of errors, view the log file afterwards and have a look at the problematic records. Once you’ve corrected all errors breaking the dump, you should set the threshold to 1 and redo the archiving to create an archive storing all records.
Archive file name: Name of the archive file to be created. The default will be constructed by concatenating web service name and data schema.
DarwinCore Archives
XML Archives that use the ABCD 2.06 schema can be converted into DarwinCore Archives. Currently, this feature is only available as a standalone command-line tool. Once thoroughly tested, it will be intregrated into the BioCASe Provider Software and can be trigged from the configuration tool.
Requirements
Since this tool is currently a standalone application, it doesn't need to be run on the same machine as the BioCASe Provider Software. But of course it can - if you're running BioCASe on a publicly available server and plan to use DwCAs for production, the BioCASe server is definitely the right place.
- Java Runtime Environment 1.5 or later installed
- 2+G of RAM available
- 100M free disk space
- One or several ABCD2.06 Archives (created with BPS3+)
Installation
- If you don't have a Java Runtime Environment (version 1.5 or later) installed on your machine, get one here.
- Download the DwCA Creator from the BioCASe Website and unzip the archive file to your machine. This will create a folder dwca for the tool.
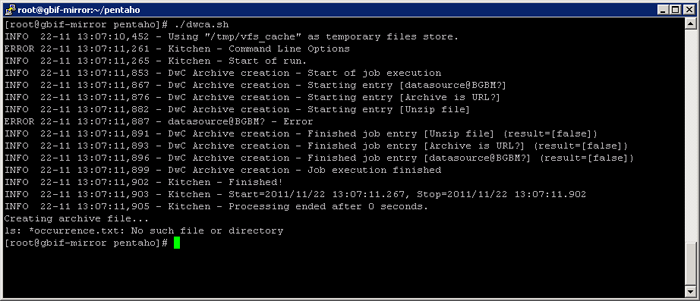
- Test the installation by opening a terminal (command prompt on Windows) and changing to the dwca folder. Start the tool by running the batch file dwca.bat on Windows or the shell script dwca.sh on Linux/MacOS. Since it doesn't do any processing, the test run should take only a few seconds and print some lines similar to following (you can ignore the warning No such file or directory in the last line):
Usage
The converter can be started with the scripts dwca.bat (on Windows) and dwca.sh (on Linux/MacOS) and usually takes one argument - the ABCD archive to be converted. The tool accepts both a file stored in the local file system and an archive available for download at a given URL.
Let's assume you've created an ABCD2 dump for your collection. You've placed the archive file (named AlgaTerra_ABCD_2.06.zip) in the same folder as the tool (dwca). To run the conversion on Linux, open a terminal window, change to the dwca folder and type in the following:
./dwca.sh AlgaTerra_ABCD_2.06.zip
On a Windows machine, use the following command. Note that the base folder for the transformer is the kettle folder, so you need to specify ..\ to direct the transformer to its parent folder for finding the archive file (alternatively, you can put the archive file in the kettle subfolder and thus spare the ..\):
dwca.bat ..\AlgaTerra_ABCD_2.06.zip
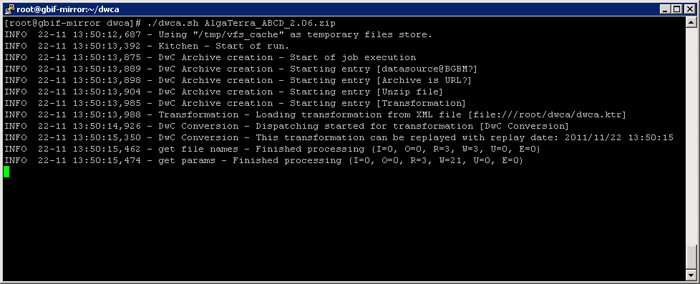
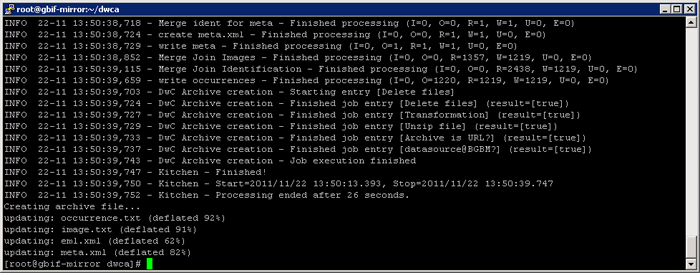
This will unzip the ABCD documents stored in the archive file, create the data files, EML document(s) and the archive descriptor(s):
Depending on the size of your collection (number of records), the amount of information published (number of concepts mapped) and the speed of your server (available memory, number of CPUs/cores), this will take from several seconds to some minutes. For large collections (millions of records), it can take up to hours. After each chunk of 50,000 records processed, a line indicating the progress will be printed, so you will be able to see if the tool is still running. However, independent of the amount of data to be processed, the last lines of the output will look similar to the following:
When creating an ABCD Archive with the BioCASe Provider Software, it becomes automatically available for download on the BioCASe installation after the process has finished. The DwCA Creator can download the archive directly from this location. So if you're BioCASe installation is accessible from the machine you're running the prototype on, you can spare the trouble of moving the file manually and provide the URL instead of a local file name.
To get the download URL for an ABCD Archive you've created, find the archive in question in the list of existing archives in the configuration tool (see here for more on that). Right-click on the Download link and choose Copy link. Then open a terminal window for the creator tool and provide the link intead of a file name:
./dwca.sh http://ww3.bgbm.org/biocase/downloads/AlgaTerra/AlgaTerra_ABCD_2.06.zip
On a Windows machine, use the following command:
dwca.bat http://ww3.bgbm.org/biocase/downloads/AlgaTerra/AlgaTerra_ABCD_2.06.zip
Output
The DwCA(s) created can be found in the folder output created in the base directory (dwca). Remember that there will be one DwCA per dataset. So depending upon how many datasets are stored in the source ABCD archive, there will be one or several files in the output folder.
On Linux and MacOS, the shell script dwca.sh will zip all files that make up one DarwinCore Archive into an archive file named after the dataset title. So you could send this files directly to a potential DwCA consumer:
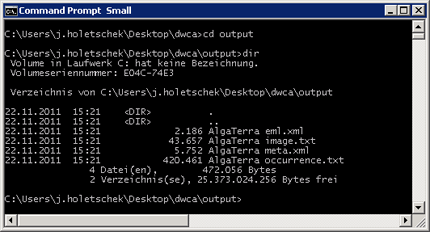
On Windows, the batch file dwca.bat of the prototype doesn't do that zipping. So if you go to the output file after the conversion has finished, you will see several text files and XML documents, all named after the pattern <dataset> <filename>. So for the example above, the output folder would look like this:
In order to create a DwCA that can be sent to a consumer, please do the follwing for each <dataset>:
- Note down the dataset title,
- Remove the dataset title in the file names (<dataset> <filename> becomes <filename>),
- Create a zip named <dataset>.zip with all the files you just renamed.
This lack of functionality is due to the limited capabilities of Windows batch files. Once integrated into the Provider Software, you won't need to zip up files manually.
Trouble Shooting
If you run into problems when using this tool, please contact us for help.
The default settings of the transormation should be working for small and medium-sized collections (up to 500,000 records). If the processing is cancelled with an OutOfMemoryError, you should try the follwing:
Increasing the maximum memory used by the transformer
Per default, the transformer will use up to 1GB of RAM for the transformation process. In case of an OutOfMemoryError, you should increase this limit to 2GB. Don't be stingy with memory, since it will be only used during the tranformation process and be freed afterwards. Moreover, this is only the upper limit, so actual memory usage might well stay below this limit.
To allow the transformer to use more memory, go to the folder kettle of your installation. Open the file kitchen.sh (Linux/MacOS) or kitchen.bat (Windows) in a text editor. Use the Find feature of the editor to go to the spot in file that specifies the memory limit. Replace the value 1024 with the amount of memory you want to allow the transformation to use, so e.g. 2048 for 2GB:
Save the file and restart the transformation.
Lowering the number of records stored in memory
Per default, Kettle will store up to 100,000 records in memory before starting to use temporary files for sorting rows. You can set this threshold to a lower value to save some memory. However, be advised that this will result in heavy disk I/O on your machine, slowing down the transformation. Therefore you should first increase the memory limit before changing this setting.
If you decide to do this, just add the desired maximim number of records to be stored in memory as a second parameter when invoking the transformer. So on Linux, type in
./dwca.sh AlgaTerra_ABCD_2.06.zip 10000
in order to set the threshold to 10,000 records. On a Windows machine, type in following:
dwca.bat ..\AlgaTerra_ABCD_2.06.zip 10000
